Unity3D Architectures: Entitas

Unity3D Architectures: Entitas
Unity3D is a powerful suite of tools (Project IDE, Code IDE, run-time) for game development. In Unity3D Game Architectures I present six different techniques for setting up your game. Depending on the size and maturity of your team, you are probably using some form the archtectures presented there. I recommend checking that article out first, then read below.
A newer architecture called Entitas was presented at Unity’s Unite Conferences (2015 and 2016). I saw the most recent presentation and recently made time for a deeper dive to learn the basics.
I created a few projects. The full source is linked at the end of the article
- Entitas Template – An ideal starting point for your next Entitas project
- Entitas ‘Pong’ – I started with the template and created a simple, complete game
While making those projects, reading documentation, and dissecting other freely available Entitas projects, I learned a lot.
Entitas for C# / Unity3D
Entitas is a super fast Entity Component System Framework (ECS) with a version created specifically for C# and Unity3D.
As the creators explain — Entitas is open source. Internal caching and blazing fast component access makes it second to none. Several design decisions have been made to work optimal in a garbage collected environment and to go easy on the garbage collector. Entitas comes with an optional code generator which radically reduces the amount of code you have to write and lets you write code that is super fast, safe and screams its intent.
Here is an excerpt from my Entitas Pong game.
//  Create human player
Entity whitePaddleEntity                     = _pool.CreateEntity ();
whitePaddleEntity.AddPaddle            (PaddleComponent.PaddleType.White);
whitePaddleEntity.AddResource        ("Prefabs/PaddleWhite");
whitePaddleEntity.AddVelocity          (Vector3.zero);
whitePaddleEntity.WillAcceptInput   (true);
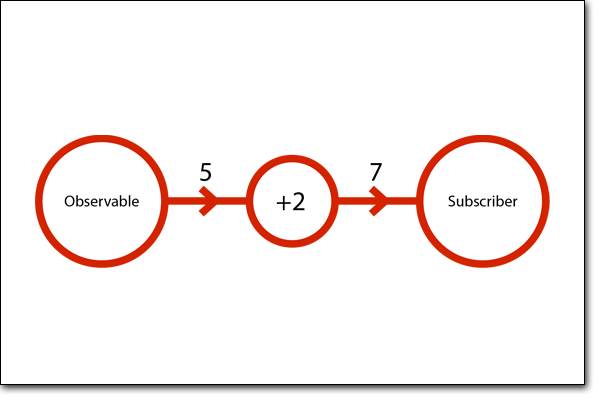
Entitas Structure
 Diagram Diagram |
 Fundamentals Fundamentals |
- Entities – Hold Components – E.g. PlayerEntity
- Groups – Hold groups of Entities (as a query optimization) – E.g. BulletGroup
- Components – Hold public variables ( Has no methods) – E.g. VelocityComponent
- Systems – Query entity/components ( Has methods to do logic ). Most of your code is here, typically acting on one or more groups. E.g. VelocitySystem
- Controllers – Monobehavior that bridge the ‘unity world’ with the ‘ECS world’. E.g. InputController
Example:
The InputController (Monobehavior) listens for Unity.Input on Update. When the phone’s screen is tapped, the InputController creates an InputEntity, each with an InputComponent with data regarding the tap The InputSystem (ISystem) processes once, only when new InputEntities exist, and it updates the PlayerEntity‘s VelocityComponent. The concept of Velocity is processed separately to update the game properly, etc…
Note: Entitas Components are NOT Unity Components (aka Monobehaviors). Think of an Entitas Component as serving ANY (one) of these roles;
- Simple data storage – e.g. myComponent.score
- Events – myEntity.WillDestroy(true) which functions something like myEntity.SendEvent (new DestroyMeEvent());
- Visual things – e.g. myComponent.view.gameObject with some standard Unity renderers attached
Visual Debugging
|
|
|

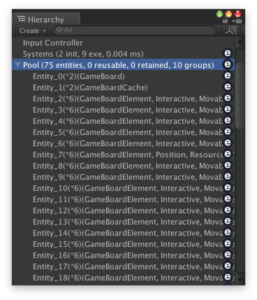 Entities
Performance
Based on data provided by the creators we see impressive run-time performance.
Unity vs Entitas. 1000 objects with 2 components;
- Memory: 9x (2.9 MB vs 0.32 MB)
- CPU: 17x (105ms vs 6ms)
Entitas is MUCH faster due to its many 0ptimizations: Entitas…
- Reuses Entities
- Reuses Components
- Caches Groups
- Index Components
Compared to a typical Unity game architecture, ECS processes logic only when processing is necessary. The Entitas system architecture and query system allows me to mix ‘processing’ strategies. For example with 100 characters onscreen I can;
- Move all characters every monobehavior.Update()
- Move half one one frame and the rest on another frame
- Move only those who have a changed position
- Etc…
Evaluation
Pros
- FAST performance
- Data-binding is implicit (OnEnityAdded/Removed/Updated, OnComponentAdded/Removed/Replaced)
- Querying is fast, efficient, and opens your mind to new ways to think about your game.
- ECS embraces Single Responsibility Principle (SRP) ( link )
- Testability*
- Code sharing (use C# on client AND server)*
* These features are greatly enabled because the UnityEngine.* classes are separated by-design from the bulk of your Entitas game logic. Testing UnityEngine.* has historic challenges. Running UnityEngine.* on server is either undesirable or impossible depending on your technology stack.
Cons
- Developing with Entitas is easy, but refactoring has challenges (see Growing Pains below)
- Best to START your project with Entitas
- Best to FULLY embrace your project with Entitas (Rather than use Entitas partially in your game)
- Collaboration takes effort between Entitas and existing code (e.g. AssetStore code)
Neutral (Things to get used to)
- With Entias you may have MANY more class files
- Entitas uses code generation (its optional, but I always used it).
- You feel like the bulk of your Entitas code is disconnected from Unity. I consider this a PRO, but it takes some time to get used to. Ex. Its standard practice to NOT store your character’s position on the gameObject.transform.
- Everything can access everything. There is a more ‘global’ state. Ex. your enemy’s code scope can fully access your hero’s health. The creators see standard OOP-based gaming structure as ‘little boxes’ (encapsulation) that you must break with every major refactor and game feature added, so instead there is much less emphasis on these ‘little boxes’ in the Entitas paradigm.
Growing Pains
Fixing compilation errors
The (optional) Enttias code generator is based on runtime reflection. The project has to compile before you can generate. This is not an issue when you creating new components, however when it comes to changing or deleting components, your code might stop compiling. Here is a list of recipes how you can avoid bigger hassle while changing and deleting components.
Ex. I stored the position of a character as float x, y, z. Then later changed it to a custom Vector3 class implementation. In a project without code generation your IDE’s ‘Rename’ or ‘Find-Replace’ functionality makes this pretty straight-forward. However, not all of the previously generated code will respect your refactor and a bit (30-60 seconds) of manually changes will be needed. Then once the project compiles again (you can use the Entitas code generation menu option to clean up the code again. I don’t have a suggestion on how, but improving this workflow is highly desirable. For now we have some helpful workarounds.
Use this advice to speed the process when doing the following tasks;
- Renaming component fields
- Renaming components
- Adding new fields to a component
- Removing fields from a component
- Deleting a component
- Renaming pool names
Resources
- Official Entitas Homepage ( link )
- Official Entitas Examples ( link )
- My Entitas Template ( link ) – Use this as a starting point for your next project
- My Entitas ‘Pong’ Game ( link ) – I started with the template and created a simple game


