Tag Archive for: Design Patterns

Unity3D Architectures: Entitas

Unity3D Architectures: Entitas

Unity3D is a powerful suite of tools (Project IDE, Code IDE, run-time) for game development. In Unity3D Game Architectures I present six different techniques for setting up your game. Depending on the size and maturity of your team, you are probably using some form the archtectures presented there. I recommend checking that article out first, then read below.

A newer architecture called Entitas  was presented at Unity’s Unite Conferences (2015 and 2016). I saw the most recent presentation and recently made time for a deeper dive to learn the basics.

I created a few projects. The full source is linked at the end of the article

  • Entitas Template – An ideal starting point for your next Entitas project
  • Entitas ‘Pong’ – I started with the template and created a simple, complete game

While making those projects, reading documentation, and dissecting other freely available Entitas projects, I learned a lot.

Entitas for C# / Unity3D

Entitas is a super fast Entity Component System Framework (ECS) with a version created specifically for C# and Unity3D.

As the creators explain — Entitas is open source. Internal caching and blazing fast component access makes it second to none. Several design decisions have been made to work optimal in a garbage collected environment and to go easy on the garbage collector. Entitas comes with an optional code generator which radically reduces the amount of code you have to write and lets you write code that is super fast, safe and screams its intent.

Here is an excerpt from my Entitas Pong game.

//  Create human player
Entity whitePaddleEntity                     = _pool.CreateEntity ();
whitePaddleEntity.AddPaddle            (PaddleComponent.PaddleType.White);
whitePaddleEntity.AddResource        ("Prefabs/PaddleWhite");
whitePaddleEntity.AddVelocity          (Vector3.zero);
whitePaddleEntity.WillAcceptInput   (true);

Entitas Structure

Diagram Fundamentals
  • Entities – Hold Components – E.g. PlayerEntity
  • Groups – Hold groups of Entities (as a query optimization) – E.g. BulletGroup
  • Components – Hold public variables ( Has no methods) – E.g. VelocityComponent
  • Systems – Query entity/components ( Has methods to do logic ). Most of your code is here, typically acting on one or more groups. E.g. VelocitySystem
  • Controllers – Monobehavior that bridge the ‘unity world’ with the ‘ECS world’. E.g. InputController

Example:

The InputController (Monobehavior) listens for Unity.Input on Update. When the phone’s screen is tapped, the InputController creates an InputEntity, each with an InputComponent with data regarding the tap The InputSystem (ISystem) processes once, only when new InputEntities exist, and it updates the PlayerEntity‘s VelocityComponent. The concept of Velocity is processed separately to update the game properly, etc…

Note: Entitas Components are NOT Unity Components (aka Monobehaviors). Think of an Entitas Component as serving ANY (one) of these roles;

  • Simple data storage – e.g. myComponent.score
  • Events – myEntity.WillDestroy(true) which functions something like myEntity.SendEvent (new DestroyMeEvent());
  • Visual things – e.g. myComponent.view.gameObject with some standard Unity renderers attached

Visual Debugging

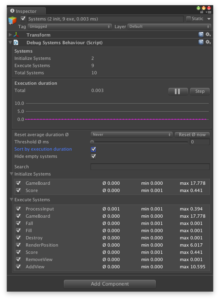
entitas_systems_v1Systems

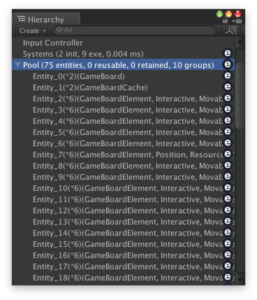
entitas_pools_v1Entities

Performance

Based on data provided by the creators we see impressive run-time performance.

Unity vs Entitas. 1000 objects with 2 components;

  • Memory: 9x (2.9 MB vs 0.32 MB)
  • CPU: 17x (105ms vs 6ms)

Entitas is MUCH faster due to its many 0ptimizations: Entitas…

  • Reuses Entities
  • Reuses Components
  • Caches Groups
  • Index Components

Compared to a typical Unity game architecture, ECS processes logic only when processing is necessary. The Entitas system architecture and query system allows me to mix ‘processing’ strategies. For example with 100 characters onscreen I can;

  • Move all characters every monobehavior.Update()
  • Move half one one frame and the rest on another frame
  • Move only those who have a changed position
  • Etc…

Evaluation

Pros

  • FAST performance
  • Data-binding is implicit (OnEnityAdded/Removed/Updated, OnComponentAdded/Removed/Replaced)
  • Querying is fast, efficient, and opens your mind to new ways to think about your game.
  • ECS embraces Single Responsibility Principle (SRP) ( link )
  • Testability*
  • Code sharing (use C# on client AND server)*

* These features are greatly enabled because the UnityEngine.* classes are separated by-design from the bulk of your Entitas game logic. Testing UnityEngine.* has historic challenges. Running UnityEngine.* on server is either undesirable or impossible depending on your technology stack.

Cons

  • Developing with Entitas is easy, but refactoring has challenges (see Growing Pains below)
  • Best to START your project with Entitas
  • Best to FULLY embrace your project with Entitas (Rather than use Entitas partially in your game)
  • Collaboration takes effort between Entitas and existing code (e.g. AssetStore code)

Neutral (Things to get used to)

  • With Entias you may have MANY more class files
  • Entitas uses code generation (its optional, but I always used it).
  • You feel like the bulk of your Entitas code is disconnected from Unity. I consider this a PRO, but it takes some time to get used to. Ex. Its standard practice to NOT store your character’s position on the gameObject.transform.
  • Everything can access everything. There is a more ‘global’ state. Ex. your enemy’s code scope can fully access your hero’s health. The creators see standard OOP-based gaming structure as ‘little boxes’ (encapsulation) that you must break with every major refactor and game feature added, so instead there is much less emphasis on these ‘little boxes’ in the Entitas paradigm.

Growing Pains

Fixing compilation errors

The (optional) Enttias code generator is based on runtime reflection. The project has to compile before you can generate. This is not an issue when you creating new components, however when it comes to changing or deleting components, your code might stop compiling. Here is a list of recipes how you can avoid bigger hassle while changing and deleting components.

Ex. I stored the position of a character as float x, y, z. Then later changed it to a custom Vector3 class implementation. In a project without code generation your IDE’s ‘Rename’ or ‘Find-Replace’ functionality makes this pretty straight-forward. However, not all of the previously generated code will respect your refactor and a bit (30-60 seconds) of manually changes will be needed. Then once the project compiles again (you can use the Entitas code generation menu option to clean up the code again. I don’t have a suggestion on how, but improving this workflow is highly desirable. For now we have some helpful workarounds.

Use this advice to speed the process when doing the following tasks;

  • Renaming component fields
  • Renaming components
  • Adding new fields to a component
  • Removing fields from a component
  • Deleting a component
  • Renaming pool names

Resources

  • Official Entitas Homepage ( link )
  • Official Entitas Examples ( link )
  • My Entitas Template ( link ) – Use this as a starting point for your next project
  • My Entitas ‘Pong’ Game ( link ) – I started with the template and created a simple game


Unity3D MVCS Architectures: StrangeIoC 2

Unity3D is a powerful suite of tools (Project IDE, Code IDE, run-time) for game development. In Unity3D Game Architectures I present six different techniques for setting up your game. Depending on the size and maturity of your team, you are probably doing some form of those. I recommend checking that article out first, then read below. In Unity3D MVCS Architectures: StrangeIoC (recommended reading before continuing) we dove deep into the great, free framework. I also explored an idea I had for an extension called PropertyChangeSignal. Here is more;

PropertyChangeSignal

To aid my work with StrangeIoC, I created a few classes that function together to reduce the workload. I call this the PropertyChangeSignal. Again we saw above that signals are used for many things. Speaking from a model’s perspective for every property (variable) you want to update in your model you may need SEVERAL signals. That is fine in my demo above with exactly one property, but imagine a ScoreModel with 5 variables, a TimerModel with 3, and a GameLogicModel with 25 more variables. You can quickly grow a HUGE list of signals. Now, creating a signal is super quick. It takes 30 seconds to create, and another 30 seconds to optionally bind it to a Command. Its certainly possible to grow your app in this conventional way (or some variety of this conventional way). Most people do exactly that. But I wanted a start a discussion on a different way.

Here is an example.

Let’s say we have a public message string in your data model and the whole app needs to interact with it.

A. Conventional Signals Per Property (4)

  • 1. requestMessageSignal.Dispatch() – If a mediator arrives on the scene late and wants to KNOW the current value of message.
  • 2. clearMessageSignal.Dispatch(targetValue) – If a command wants to CLEAR the current value of message.
  • 3. updateMessageSignal.Dispatch(targetValue) – If a command wants to SET current value of message.
  • 4. updatedMessageSignal.Dispatch(newValue) – After any updates happen, the model sends this out to those listening who can GET the value.

B. PropertyChangeSignals Per Property (1)

  • 1. pcSignal.Dispatch (new PropertySignalVO(PropertyChangeType.REQUEST) )
  • 1. pcSignal.Dispatch (new PropertySignalVO(PropertyChangeType.CLEAR) )
  • 1. pcSignal.Dispatch (new PropertySignalVO(PropertyChangeType.UPDATE, newValue) )
  • 1. pcSignal.Dispatch (new PropertySignalVO(PropertyChangeType.UPDATED, currentValue) )

So in B, we see far less signals used (1 vs 4), but an longer syntax for the call. Soon I’ll request your feedback based on the source-code.

Update:  Download the full source below.

Syntax Example

1. CONTEXT – SETUP BINDING

[actionscript3]

commandBinder.Bind<GameListPropertyChangeSignal>().To<GameListPropertyChangeCommmand>();

[/actionscript3]

2. COMMAND – HANDLE BINDING

[actionscript3]
public override void Execute()
{

switch (propertyChangeSignalVO.propertyChangeType) {

case PropertyChangeType.CLEAR:
//ASK TO CLEAR THE MODEL
iCustomModel.doClearGameList();
break;
case PropertyChangeType.UPDATE:
//ASK TO UPDATE A VALUE IN THE MODEL
iCustomModel.gameList = propertyChangeSignalVO.value as List<string>;
break;
case PropertyChangeType.UPDATED:
//FOR THIS PROJECT, THE VIEW LISTENS DIRECTLY TO ‘UPDATED’
//OPTIONALLY, WE COULD ALSO DO SOMETHING HERE IF NEEDED
break;
case PropertyChangeType.REQUEST:
//FORCE THE MODEL TO RE-SEND ‘UPDATED’ (WITH NO CHANGE)
//THIS IS VERY COMMON IN APPS (E.G. A TEMPORARY A DIALOG PROMPT)
iCustomModel.doRefreshGameList();
break;
default:
#pragma warning disable 0162
throw new SwitchStatementException(propertyChangeSignalVO.propertyChangeType.ToString());
break;
#pragma warning restore 0162

}

}

[/actionscript3]

3. MODEL – DISPATCH CHANGES
[actionscript3]
private List<string> _gameList;
public List<string> gameList
{
get
{
return _gameList;
}
set
{
//TODO: CONSIDER ALTERNATIVE THAT CHECKS "_gameList != value" BEFORE DISPATCHING
_gameList = value;
gameListPropertyChangeSignal.Dispatch (new PropertyChangeSignalVO(PropertyChangeType.UPDATED, _gameList) );
}
}

[/actionscript3]

4. VIEW – HANDLE CHANGES
[actionscript3]
private void _onGameListPropertyChangeSignal (PropertyChangeSignalVO aPropertyChangeSignalVO)
{
if (aPropertyChangeSignalVO.propertyChangeType == PropertyChangeType.UPDATED) {

doRenderLayout(aPropertyChangeSignalVO.value as List<string>);

}
}

[/actionscript3]

Video

[tubepress video=”87903532″]

Member Resources

Members can access the full source-code for this post. Membership is free.

[private_Free member]Enjoy this members-only content!

[/private_Free member]

Unity3D MVCS Architectures: StrangeIoC

Unity3D is a powerful suite of tools (Project IDE, Code IDE, run-time) for game development. In Unity3D Game Architectures I present six different techniques for setting up your game. Depending on the size and maturity of your team, you are probably doing some form of those. I recommend checking that article out first, then read below.

The Strange IoC Template

I consulted for years with PureMVC. From that, a spiritual successor with dependency injection was born as Robotlegs (RL). RL became my default choice for many projects. I’ve used both within the last year. Depending on client preferences. To share with the world a simple, consistent, starter project I created and shared a Template for PureMVC and a Template for RobotLegs. I continue that same ‘template idea’ for the article here. There is no popular version of those for Unity, until now. StrangeIoC is a fantastic, free implementation of Robotlegs plus Signals. Signals for C# comes from separate project available in other programming languages which replaces the standard use of Events dispatched often through a central Event Bus. The benefits of Signals are well known, but not everyone prefers them. I do prefer them, so my template exclusively includes Signals instead of Events. You can do either or both in StrangeIoC. You can play the unshockingly unsexy demo here, and then read about the internals here in the article, with full source-code (See ‘Members Resources’ below).

Figure 1. Click Image To Play “StrangeIoC Template”

Table of Contents

  1. What is StrangeIoC?
  2. My StrangeIoC Template
  3. My PropertyChangeSignal Extension for StrangeIoC

1. What is StrangeIoC?

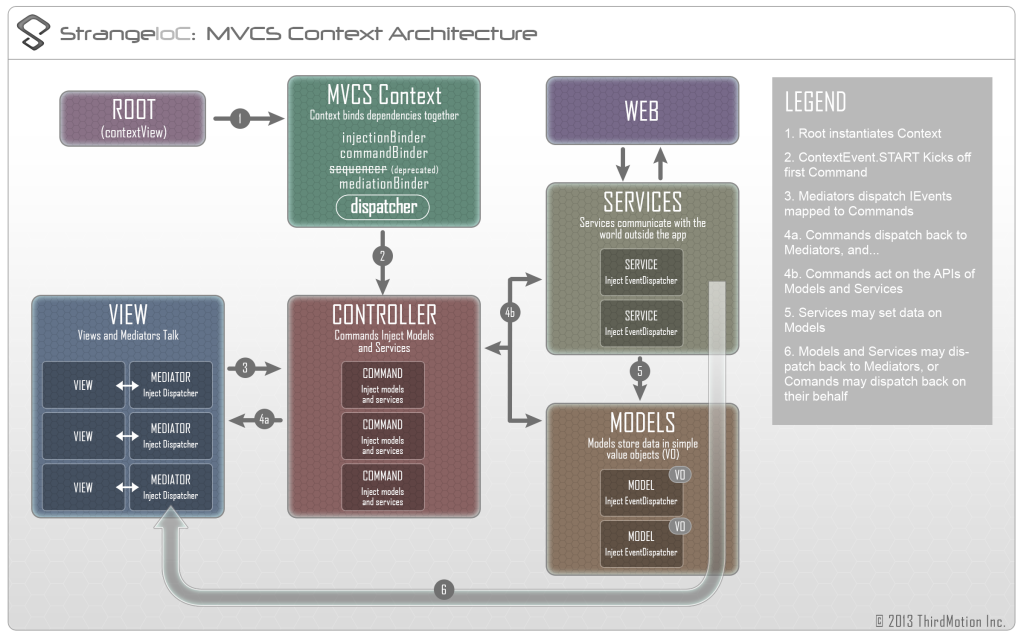
Strange is a super-lightweight and highly extensible Inversion-of-Control (IoC) framework, written specifically for C# and Unity. The StrangeIoC team has validated Strange on web, standalone, and iOS (currently testing on Android).

Figure 2.

Figure 2. StrangeIOC Diagram

StrangeIoC includes;

  • IoC through Dependency Injection
  • Choice of Signals and/or Events (with 2 styles of EventBus)
  • MonoBehaviour mediation
  • Optional MVCS (Model/View/Controller/Service) structure
  • Multiple contexts (parts of your app can ‘care for themselves’ if desired)
  • And much more…

Pros:

  • Public, Community-driven, well-documented. (e.g. You can hire/contract a new developer who arrives with this skill on day 1)
  • Decoupled, testable, & D.R.Y.
  • Scales-up well for large teams, large projects

Cons:

  • Slower to setup (but faster to add last-minute changes)
  • Steeper learning curve, especially for junior developers
  • Demands discipline/know-how from your team to put logic in its proper place (but removes the ‘where should we put that code?’ decision process)

2. My StrangeIoC Template

While the MVCS setup for Strange is optional, it is my preference. To understand the template. It is absolutely necessary to understand the fundamentals before digging into my source-code. For those familiar with MVCS, the learning curve is very quick. For those familiar with Robotlegs, you are in luck, the creators of Strange have a special “Introduction to Strange for Robotlegs Users“. I haven’t read that, but in general the Strange documentation is very well written, light (fun?), and relevant.

Diagram
Figure 3. StrangeIOC Template Diagram
  Diagram
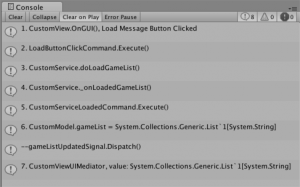
Figure 4. StrangeIOC Template Console

Pros:

  • Together with this article, I hope it the template is a GREAT way for you to learn StrangeIoC
  • Coming from PureMVC or Robotlegs? (Download and compare the similar templates for PureMVC and RobotLegs)
  • Intuitive for beginners, e.g. “Bowling-pin code goes on the bowling-pin”

Cons:

  • My style is just ONE way to use StrangeIOC. Every team should learn their own style.
  • It is a very, very simple example (this is also ‘pro’)
  • My Unity3D/C# coding standards are NOT the official Microsoft way. Ha!

Video

Part of the Unity With Cocktails video training series,  this video covers the “My StrangeIoC Template” section of this article. While the purpose and definition of MVCS is not explicitly included, there is some related tidbits in there. Also we see the ‘5 major steps’ in setting up StrangeIoC. 

[tubepress video=”82322606″]

More Info on MVCS

For the uninitiated to MVCS, let’s dig in! There is tons of info online so I’ll keep this section light (fun?). The basic idea is that you purposefully separate you coding stuff (‘coding concerns’) into 4 distinct areas which are discussed below. If the app doesn’t talk to any backend servers, you don’t need the service. So you often see the same basic structure described as MVC. But we’ll use MVCS just to be comprehensive.  So, looking at the diagram (Figure 3.) we can see some major areas of the application. The layout of this diagram mimic like the StrangeIOC Official Diagram above (Figure 2.). MVCS (for laymans)

  • Model – “I hold ALL of the data, ha ha ha.”
  • View – “Hey, look at this” (graphics, gui, sound) and “Oh, you clicked the mouse” (input), “Either way I’ll tell the controller about it”.
  • Controller – “Hey Model (or Service), someone clicked a button so do X or Y”, or “Service, you loaded? Ok, I’ll tell the model”, or “Thanks Model for the updated data, I’ll tell the view to show that”.
  • Services – “Welcome everyone, I’m going to just load stuff from offline files and online servers and tell the controller”.

Sample Orchestration: Clicking the Load Button Orchestration is my term for one ‘trip’ through some part of the MVCS for a specific purpose. Here we go from a button click to data storage and back to update the screen. We’ll step through the numbers from the console output (see Figure 4.). From View To Model Starting with the view (1), the user clicks the button in the UI, and the UI holding the button tells its paired mediator about it. The mediator sends a message (dispatches a signal which is mapped already to a command) and a command is executed (2). The command knows what needs to be done (a.k.a. business logic) and in this case that means to tell the service to load data from a local file (3). When the service finishes loading (4), its sends a message (dispatches a signal which is mapped already to a command), and a command is executed (5) which knows to put the freshly loaded data from the service into the model (6). From Model to View Continuing on, the model updates its internal data storage and then sends a message which anyone who cares can listen to. In this case the mediator is listening (7) and knows to update the UI.

Its important to note that while data started in the service and was passed around a bit before finally landing in the model, that – its the model that STORES the data as a class variable. The other data is temporary variables and they go away quickly. Its like wires that hold electricity temporarily but really only the battery STORES the electricity.

That sounds like a lot of steps. Yes it is. And for each ‘button’ or feature you add to the app you do something similar. However, very early in the learning curve you will both a) get fast at adding new features and b) see the benefits of mvcs.


3. PropertyChangeSignal

To aid my work with StrangeIoC, I created a few classes that function together to reduce the workload. I call this the PropertyChangeSignal. It helps to streamline your workflow in data-heavy applications where you need signals for data events such as REQUEST, CLEAR, UPDATE, and notify upon UPDATED.

Update: The complete article “Unity3D MVCS Architectures: StrangeIoC 2 PropertyChangeSignal” is ready. Check it out!


What’s next?

Want to learn something more basic? Or are you ready for more advanced topics about UnityEngine and C#? Checkout my “Unity With Cocktails” HD Tutorial Video Series on C# and Unity.

Member Resources

Members can access the full source-code for this post. Membership is free.

[private_Free member]Enjoy this members-only content!

[/private_Free member]

What are your thoughts?

Do you prefer an alternative to the suggestions above? Or do you have an additional recommendation? Please comment below. [polldaddy poll=7611650]

Unity3D Game Architectures

Unity is a powerful suite of tools (Project IDE, Code IDE, run-time) for game development.

I have explored many architectural approaches to game projects. Architecture is a hot topic in Unity — especially related to scaling up to larger Unity game projects.

My architectural background includes many frameworks. Highlights include heavy usage of Robotlegs (I event contributed to the project and drew the official diagram), PureMVC (I was the technical editor for the O’Reilly book on it), and PushButton (I published related articles for Adobe). I also presented and taught about the three at conferences and weekend workshops. Of these, only PushButton is a game-specific architecture, but all can be applied to games.

What are the qualities of a good gaming architecture? Most architects applaud solutions which are flexible, readable, D.R.Y., testable, orthogonal, and “refactorable” (at an acceptable cost). I will discuss the philosophy of design in a future post, but for now I simply list the major pros and cons of each approach.

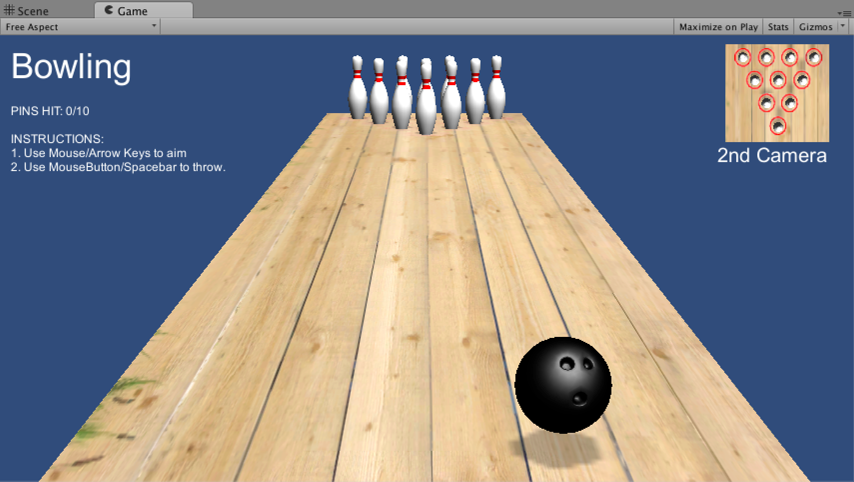
Unity3D Bowling

What are the qualities of a good gaming architecture? Solutions which are flexible, readable, D.R.Y.testableorthogonal, and “refactorable” (at an acceptable cost). I will discuss the philosophy of design in a future post, but for now, I simply list the major pros and cons of each approach.

Figure 1. Click Image To Play “Bowling”

I review some common approaches and a few novel ones. For each, there are images, details, and an example with full source-code (See ‘Members Resources’ below).

Table of Contents

  1. No Manager
  2. EmptyGO
  3. SimpleGameManager
  4. uMom
  5. Custom MVCS
  6. StrangeIoC

1. No Manager

This is your most basic approach. First-time Unity-developers often start with this technique. Here you put bowling ball code on the bowling ball, bowling pin code on the bowling pin, and ‘game win vs game loss’ code on something random, like the bowling ball too.

Because Unity’s ‘component-based’ approach is so intrinsically awesome (reusable code ‘components’ sit on 1 or more GameObject ‘entities’) you can indeed get very far using this approach. If you are coming from a hierarchical approach to gaming, learning the component-approach can be a challenge and your first projects may be of this ‘No Manager’ approach here in #1 or soon evolve to the ‘EmptyGO’ approach we see below in #2.

Diagram
Diagram
Diagram
Hierarchy

Type: Component-based

Pros:

  • There are MANY free, useful tutorials created using this “No Manager” approach. So its easier to learn the basics of Unity this way.
  • Flexibility for prototyping
  • Intuitive for beginners, e.g. “Bowling-pin code goes on the bowling-pin”

Cons:

  • It is the very definition of spaghetti code
  • Very low scalability for teams (of 3 or more)
  • Very low scalability for projects of intermediate or high complexity.

2. EmptyGO

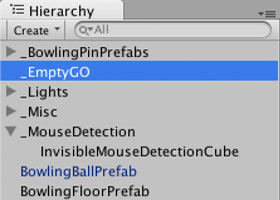
This is a slight evolution beyond #1 above. Still you put bowling ball code on the bowling ball, bowling pin code on the bowling pin, BUT you try now to put all the rest of code which has no visual representation in the world onto an invisible or ’empty’ GameObject (GO). Hence the name ‘EmptyGO’.

This technique still has alot of drawbacks, but at least we begin to see game logic more centralized (on that EmptyGO). This aids readability for newbies working on your project, or for you after you return to an older project after a long time. You don’t need to hunt around everywhere to find your core code — most sits there on the EmptyGO.

Diagram
Diagram
Diagram
Hierarchy

Type: Component-based

Pros:

  • More readable (than #1 above)
  • Good mix of flexibility for prototyping (yet not AS much spaghetti code as #1 above)
  • Intuitive for beginners, e.g. “Bowling-pin code goes on the bowling-pin”

Cons:

  • Less testable
  • Less refactorable (since less code is likely to be properly abstracted, decoupled, and reusable when compared to 3,4,5,6 below)
  • Communication and referencing between GameObjects is likely too brittle (e.g. using GameObject.Find() or inspector target references)

3. SimpleGameManager

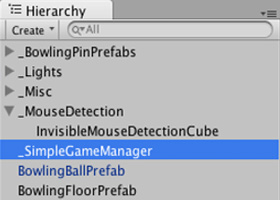
Probably the most mature technique which is in WIDE usage within the free tutorials and sample projects you find in the community is something like my SimpleGameManager technique. Imagine the ‘EmptyGO’ from #2 above, but now its a persistent (between scenes) Singleton.

Code still exists directly the GameObjects in the world, but whenever possible it calls centralized code [e.g. ‘SimpleGameManager.Instance.playSound (“GunShot”); ] Its a good approach and an appropriate (simple) solution for many small projects.

Diagram
Diagram
Diagram
Hierarchy

Type: Component-based w/ Manager

Pros:

  • Ultra-fast setup (but with minimal functionality). Its more of a racetrack — where YOU must supply the race-cars.
  • Persists between scenes, and if its not created it will create itself as soon as it is referenced (because its a Singleton).
  • Ideal for prototypes (but thus not scalable)

Cons:

  • Its not plug-and-play per say. The current workflow is to import the package and EDIT the core class, rather than use/extend.
  • Not D.R.Y.
  • Less testable. Much of your code STILL sits around on various GameObjects (like in 1 & 2 above).

Sample Game


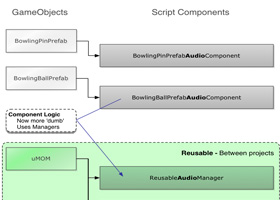
4. uMOM

My (unreleased) uMOM Asset Store project arose from a problem inherent in Unity. There is no default Main.main() type ‘hook’ to centralize the entry into your run-time and no default way for UI and code to persist from scene to scene. This was the genesis of the Unity Manager of Managers (uMOM), pronounced as /you-mom/. You can read more at the uMOM Dev Diary and see the status of the project (it has some issues). Here is a short summary of purpose and benefits;

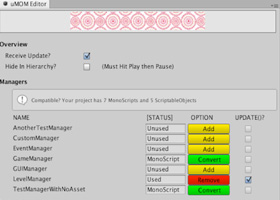
The uMOM package allows developers to add one or many reusable, custom manager classes to the project. Each ‘start’ automatically, have a predictable life-cycle (reset, add, update, remove), optionally receive ‘update()’ calls, optionally run during edit mode, and optionally persist between scenes. Managers operate as singletons and can easily address each other to collaborate.

Types of uMOM Managers: Really anything is possible, but here is the short list of use cases I will address first. Use some of mine or none of mine – then create your own. Most any existing manager class you have can easily be converted for compatibility here. 

  • uEventManager -Streamline messaging between classes. Replace the need for Unity’s clunky ‘SendMessage’ and instead dispatch strongly typed objects. (The uEventManager will also be available separately).
  • Store references to audio clips (drag-n-drop) and control audio playback via C# from one place.
  • GUIManager – Layout UI which optionally persists between scenes. Centralize the controls to handle clicks, etc…
  • PoolManager – Optimize your run-time performance by persisting GameObject or prefab instances in RAM and displaying them as needed.
  • LevelManager – Queue up levels and perform transitions (e.g. fade-in-out) between them.
  • GameManager – While other managers are not project specific, this one likely is. Here you manage the core game mechanics, how the user wins and loses, store the score, etc…
  • SaveManager: Takes care of saving and loading user preferences and achievements.
  • MenuManager: Controls all menus, managing their animations, their contents, and their behaviors. Perhaps it heavily uses the GUIManager for layout.
  • Much, much, more…
Diagram
Diagram
Diagram
Hierarchy

Type: Component-based w/ Manager

Note: The images and source-code for this architecture are not yet available.

Pros:

  • Reuse code between projects. That is probably its greatest strength. Ultra fast to setup with mucho out-of-the-box functionality. Nice GUI!
  • Have global access (also a con) to managers which are decoupled by discipline (GUIManager, LevelManager, AudioManager, etc…) each with a common interface and life-cycle.
  • Scalable to large teams such as 4-10 developers (but may require more planning upfront and dedicated team members creating the managers vs. those using the managers)

Cons:

  • The benefits of MVCS separation are not implicit ( but are possible ).
  • More scalable to complex games than 1,2,3 above, but far less than 6 below.
  • Still in alpha with bugs which prevent production-readiness.

5. uMVCS

For non-game projects, such as data-driven applications, there is a clear favorite in architectures; the Model-View-Controller-Service (MVCS or MVC). For the uninitiated, its where you separate your code into 4 areas; the data, the user interface, the core functionality, and any calls to/from backend-servers. It seems like OVERKILL at first, but once one is well-practiced he/she can drop in a template (e.g. Unity Package) and in 5 minutes  be ready to rock.

The “uMVCS” is a ultra-light framework I created myself. Its one of many, many setups for MVCS. I created recently, from scratch in just few hours for ACADEMIC PURPOSES ONLY. It is not complete and scalable like other implementations, but if you have never touched MVCS before, its a great way to learn.

Diagram
Diagram
Diagram
Hierarchy

Type: MVCS

Note: The images and source-code for this architecture are not yet available.

Pros:

  • Great for learning
  • Uses a custom event-dispatcher implementation of the observer pattern for decoupled communication from any scope to any scope.
  • Heavy use of Singletons (also a con) allows access to the ‘architecture’ from any coding scope.

Cons:

  • Purposefully incomplete, it exists just to help newbies learn about code-separation with MVCS.
  • No command-pattern.
  • I created it in 90 minutes. Ha.

6. StrangeIoC

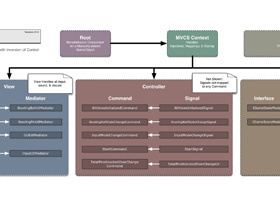
Here we add to organizational benefits of MVCS the ease-of-development feature called inversion of control (IoC). To learn more. Here is the official Strange diagram of the MVCS overview and the StrangeIoC website.

Diagram
Diagram
Diagram
Hierarchy

Type: MVCS w/ IoC

Note: The source-code for this architecture is available below. It works great, but upon clicking to restart it breaks. Still working on that. Have a solution? Download the source and comment below this post. Please!

Note: Updated! Now see my complete article on StrangeIoC For Unity3D

Pros:

  • Public, Community-driven, well-documented. (e.g. You can hire/contract a new developer who arrives with this skill on day 1)
  • More decoupled, testable, & D.R.Y.
  • Scales-up well for large teams, large projects

Cons:

  • Slower to setup (but faster to add last-minute changes)
  • Steeper learning curve, especially for junior developers
  • Demands discipline/know-how from your team to put logic in its proper place (but removes the ‘where should we put that code?’ decision process)

Sample Game


What’s next?

Want to learn something more basic? Or are you ready for more advanced topics about UnityEngine and C#? Checkout my “Unity With Cocktails” HD Tutorial Video Series on C# and Unity.

Member Resources

[private_Free member]Enjoy this members-only content!

  • Download Bowling Game source-code (1. No Manager )
  • Download Bowling Game source-code (2. EmptyGO )
  • Download Bowling Game source-code (3. SimpleGameManager )
  • Download Bowling Game source-code (6. StrangeIoC )
  • Update: April 2014 – I don’t think any more source will be added to this post, until I add a new architecture to the list some day.

[/private_Free member]

What are your thoughts?

Do you prefer an alternative to the suggestions above? Or do you have an additional recommendation? Please comment below.

[polldaddy poll=7611650]

Unity3D & C# Design Patterns

Category: Quick Tips     |     Tags: C#, Design Patterns, Games, Mobile, Unity3D

As always, RivelloMultimediaConsulting.com/unity/ will be the central location for deep articles and tutorials, Facebook.com/RivelloMultimediaConsulting (like us!) will engage the growing RMC+Unity community, and for the latest opinions and cool links follow me at Twitter.com/srivello.

Design Patterns Defined

As BlackWasp explains, Design patterns provide solutions to common software design problems. In the case of object-oriented programming, design patterns are generally aimed at solving the problems of object generation and interaction, rather than the larger scale problems of overall software architecture. They give generalised solutions in the form of templates that may be applied to real-world problems. Design patterns are a powerful tool for software developers. However, they should not be seen as prescriptive specifications for software. It is more important to understand the concepts that design patterns describe, rather than memorizing their exact classes, methods and properties. It is also important to apply patterns appropriately. Using the incorrect pattern for a situation or applying a design pattern to a trivial solution can over-complicate your code and lead to maintainability issues. A group of developers, the Gang of Four, publicized these 23 design patterns.

Creational Patterns
1. Abstract Factory Creates an instance of several families of classes
2. Builder Separates object construction from its representation
3. Factory Method Creates an instance of several derived classes
4. Prototype A fully initialized instance to be copied or cloned
5. Singleton A class of which only a single instance can exist
Structural Patterns
6. Adapter Match interfaces of different classes
7. Bridge Separates an object’s interface from its implementation
8. Composite A tree structure of simple and composite objects
9 .Decorator Add responsibilities to objects dynamically
10. Facade A single class that represents an entire subsystem
11. Flyweight A fine-grained instance used for efficient sharing
12. Proxy An object representing another object
Behavioral Patterns
13. Chain of Resp. A way of passing a request between a chain of objects
14. Command Encapsulate a command request as an object
15. Interpreter A way to include language elements in a program
16. Iterator Sequentially access the elements of a collection
17. Mediator Defines simplified communication between classes
18. Memento Capture and restore an object’s internal state
19. Observer A way of notifying change to a number of classes
20. State Alter an object’s behavior when its state changes
21. Strategy Encapsulates an algorithm inside a class
22. Template Method Defer the exact steps of an algorithm to a subclass
23. Visitor Defines a new operation to a class without change

Design Patterns for Unity 3D / C#

C# is a robust language, and all popular design patterns are possible. However, which design patterns are most appropriate to Unity3D and game development?

1. Which patterns above are ‘built-in’ to the Unity3D experience?

I’m curious of your help here. Please add a comment below.

2. Which patterns above would you like to see in my training series?

My Unity3D & C# HD Video tutorial series will feature sections about architecture and design patterns. What would you like to see covered? [polldaddy poll=7364605]

Unity, Meet Server

Category: Quick Tips     |     Tags: C#, Design Patterns, Experimental, Unity3D

Unity 3D & C#

Unity3D is a powerful suite of tools (Project IDE, Code IDE, run-time) for game development.

As always, RivelloMultimediaConsulting.com/unity/ will be the central location for deep articles and tutorials, Facebook.com/RivelloMultimediaConsulting (like us!) will engage the growing RMC+Unity community, and for the latest opinions and cool links follow me at Twitter.com/srivello.

There is incredible momentum in the Unity3D product and its community. I recently posted “The Best C# Code Naming Conventions” and “Unity Best Practices“.  Here we will explore communication between Unity and the external environment.

Why External Communication?

Unity projects are packaged, by default, into one self-contained file.  This may be an executable for Mac, PC, or Linux, it may be embedded in a supported desktop web browser, or may be deployed to the app stores. While the capabilities of a self-contained project are impressive communicating with the ‘outside world’ still has many benefits.

  1. Persistence – Store state permanently for future use in the same app, on another device, or in another app altogether. Sky’s the limit!
  2. Collaborate – With the containing environment (such as the embedding page in a browser-based project).
  3. Multiplayer – Send data between instances of your game for turn-based (asynchronous) or real-time (synchronous) communication.
  4. 3rd Party APIs – Contact Facebook, Twitter, send email, etc…

Here is a cursory summary of what is possible and relevant references.

What is Possible?

General Data

Load JSON

Load XML

Load Image

RPC Calls

Access Twitter

  • Compare many packages in the Unity Asset Store

Access Facebook

  • Compare many packages in the Unity Asset Store

Unity Web Player <-> Browser Communication

Multiplayer

The network view is the binding material of multiplayer games. With this you can define exactly what is to be synchronized over the network and how it should be done. Game objects can have NetworkView components which can be configured to watch other components for the object. For more information see the Network View manual page and the component reference page.

Asset Bundles

AssetBundles (a Unity Pro-only feature) are files which you can export from Unity to contain assets of your choice. These files use a proprietary compressed format and can be loaded on demand by your application. This allows you to stream in content, such as models, textures, audio clips, or even entire scenes separately from the scene in which they will be used. AssetBundles have been designed to simplify downloading content to your application. AssetBundles can contain any kind of asset type recognized by Unity, as determined by the filename extension. If you want to include files with custom binary data, they should have the extension “.bytes”. Unity will import these files as TextAssets.

What Do YOU Think?

Have a comment? Please post below. This is a hot topic and I’ll respond promptly over the next month.

Unity C# State Management

Category: Quick Tips     |     Tags: C#, Design Patterns, Experimental, Unity3D

Unity C# State Management

Unity 3D & C#

Unity3D is a powerful suite of tools (Project IDE, Code IDE, run-time) for game development.

As always, RivelloMultimediaConsulting.com/unity/ will be the central location for deep articles and tutorials, Facebook.com/RivelloMultimediaConsulting (like us!) will engage the growing RMC+Unity community, and for the latest opinions and cool links follow me at Twitter.com/srivello.

There is incredible momentum in the Unity3D product and its community. I recently posted “The Best C# Code Naming Conventions” and “Unity Best Practices“.  I came across one best-practice that requires a bit of setup, so here it is; using symlinks for game development.

What Is State?

As UnityGems points out – Every program you write is a state machine.  The moment you write an if statement you have created code that can be in at least one of two states – the more code you write the more states the program can be in.  An explosion of switch and if statements can quickly get out of hand, with strange bugs appearing for apparently impossible to fathom reasons as the complexity of the solution increases and interactions between components causes unexpected consequences.  Your project becomes hard to extend and even harder to conceptualize.

How Do We Manage It?

You are probably already managing state in your projects; perhaps just with simple conditionals. As your skills mature to match your growing needs you may benefit from some alternative solutions.

Here is a partial list of options (from least to most complex/powerful);

  1. Conditionals (or similar ‘manual’ technique)*
  2. State Pattern
  3. State Machine*

* Full source code and Unity project available. See ‘Member Resources’ below.

State Machine Example

In the following example, imagine a camera and a cube in the scene. The cube has one script attached; StatesByStatePatternComponent. This class holds _stateType as a variable of type StateType. Upon user mouse-click the state is toggled. Toggling updates the iState variable of type IState to either an instance of the class FirstState or the class SecondState. The granular, state-specific functionality is handled within those two classes.

In a more complex use of the State Pattern, such as that of a full game, the state could be used to handle the input and movement. Perhaps a PlayerComponent which controls our hero has a WalkingState, JumpingState, and ShootingState. We would want only ONE of these to be active at a time and the character would behave differently depending on the state. Just like that!

3 Examples are below

  • States By Conditionals– This is the most simple, intuitive approach for beginners with simple needs
  • States By State Pattern – This is more robust. This addresses the typical demands of many projects. For advanced uses, add concepts of actions, triggers, transitions.
  • States By Interfaces – An alternative approach.


States By Conditionals

[gist id="813f2d88bd075cc9c9b0e0d0fa534777"]

States By State Pattern

[gist id="6fb85d3298e6e3ddcb9a3857c71d321a"]

States By Interfaces

[gist id="0119d67a4c850d103b1e2c01e456a5b2"]


Wait, An FSM?

Finite State Machines (FSM) are as much a style of programming as they are the code that realises them – says UnityGems.  We strongly urge you to consider thinking about your game and everything in it in terms of the states that they can maintain.
What are Finite State Machines?

Want to see my full demo of FSM? It is not yet posted. Please comment below.

The clue is in the word finite – in other words: limited, known and understood.  When you build a finite state machine you define clearly all of the states that an object can occupy and you think about the object being in just one of those states at a time.

Thinking about your project in terms of finite state machines helps you conceptualize your game at a higher level, enabling you to keep more of it in your head at one time and more clearly see the path to implementing the killer feature you just thought up or your play testers demanded.

What Do YOU Think?

Have a comment? Please post below. This is a hot topic and I’ll respond promptly over the next month.

Member Resources

[private_Free member]Enjoy this members-only content!

[/private_Free member]